
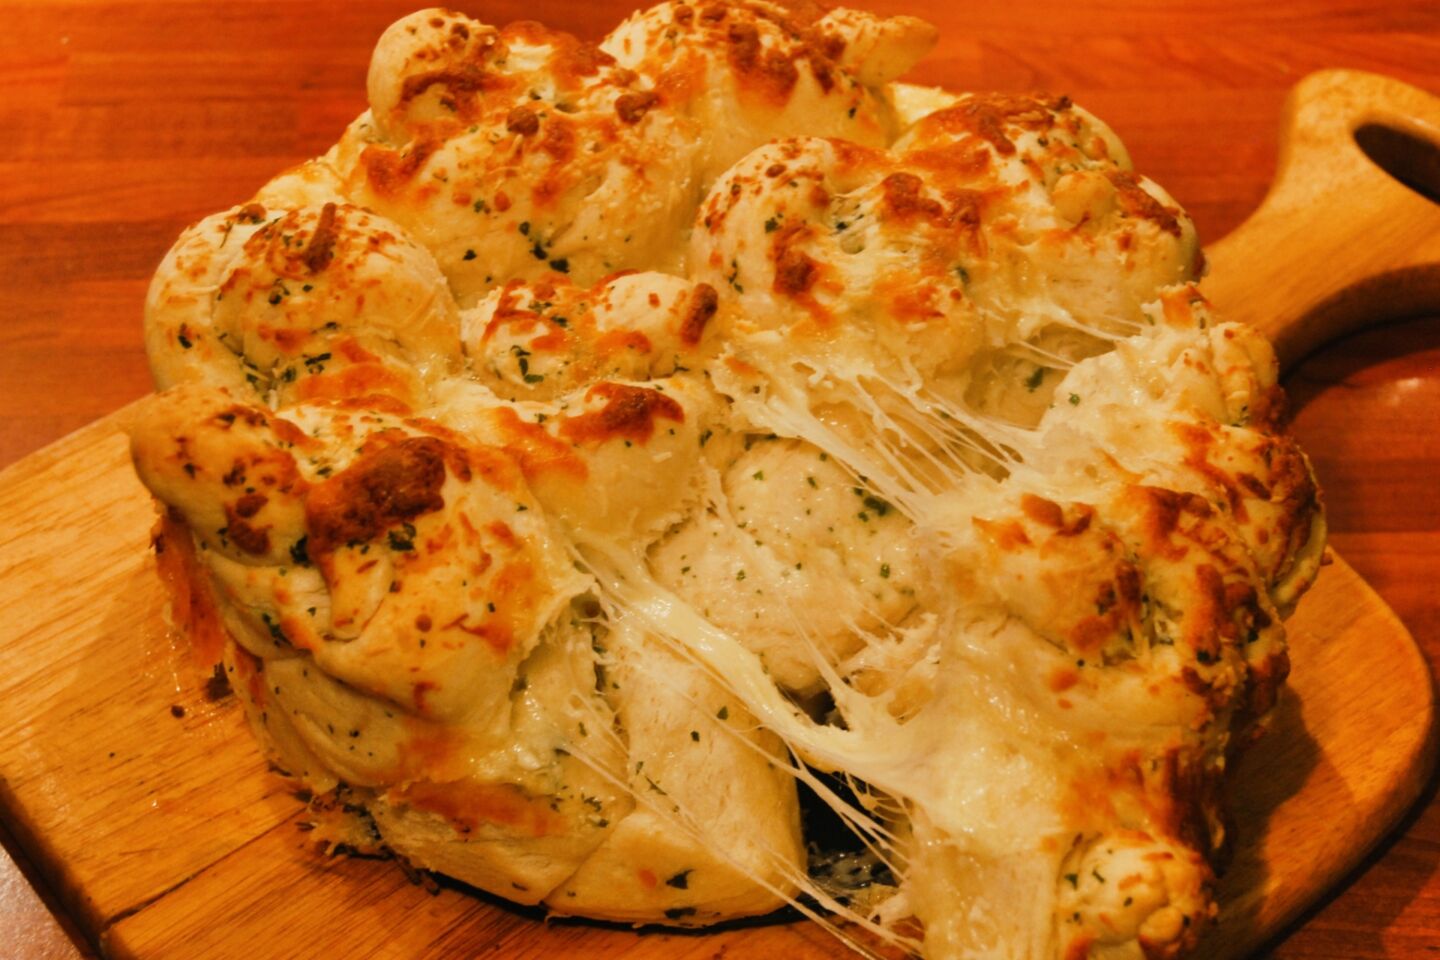
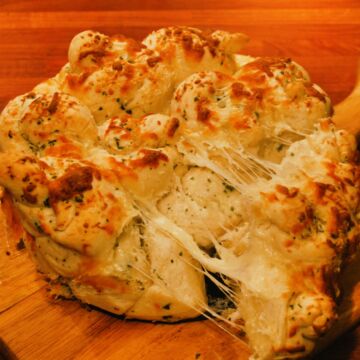
This pull-apart garlic bread recipe is the perfect sharing bread that is soft, buttery, and garlicky to satisfy your cravings! A classic favorite and an easy recipe to boot, all you need are some simple ingredients, an oven, and around 40 minutes of baking time - that's it!

Contents
🌟 Why this recipe works
Garlic bread is always a hit with guests and families alike, and this pull-apart version is even better! This recipe uses simple ingredients that you probably already have in your pantry - like active dry yeast, sugar, flour, cheese, olive oil, and some garlic butter.
The butter and garlic are what really give this bread its flavor, as the butter creates a golden-brown crust, and the garlicky aroma fills the kitchen. The parmesan cheese and parsley add a nice hint of flavor and are also a unique way to top off this delicious garlic bread.
It's the perfect bread to share with your family and friends. Each piece is soft and fluffy, with a crunchy crust that holds the cheesy and garlicky flavors. Plus, it's easy to make and doesn't require much time or effort!
You can eat tasty garlic bread any time of the snack for a quick snack or serve it with main meals as a side dish. However you choose to eat it, you will love it!
And if you want more pull-apart delicious bread recipes, check out our sweet monkey bread, pizza monkey bread, artisan bread, focaccia bread or challah bread.
🍽 Key Ingredients
This recipe calls for a few pantry ingredients to make the perfect pull-apart garlic bread:
Active dry yeast - Yeast is the ingredient that helps the dough rise and gives it structure.
Sugar - The sugar helps activate the yeast and gives the bread a slight sweetness.
Water - Lukewarm water is used to dissolve the yeast for leavening.
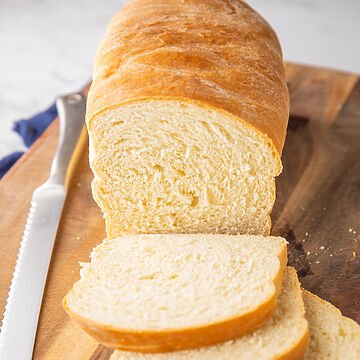
Flour - All-purpose flour is the best flour to use for this recipe as it will give the bread a nice light and fluffy texture.
Salt - The salt helps to balance the flavor of the bread and also makes it more flavorful.
Olive oil - The olive oil adds moisture and flavor to the bread.
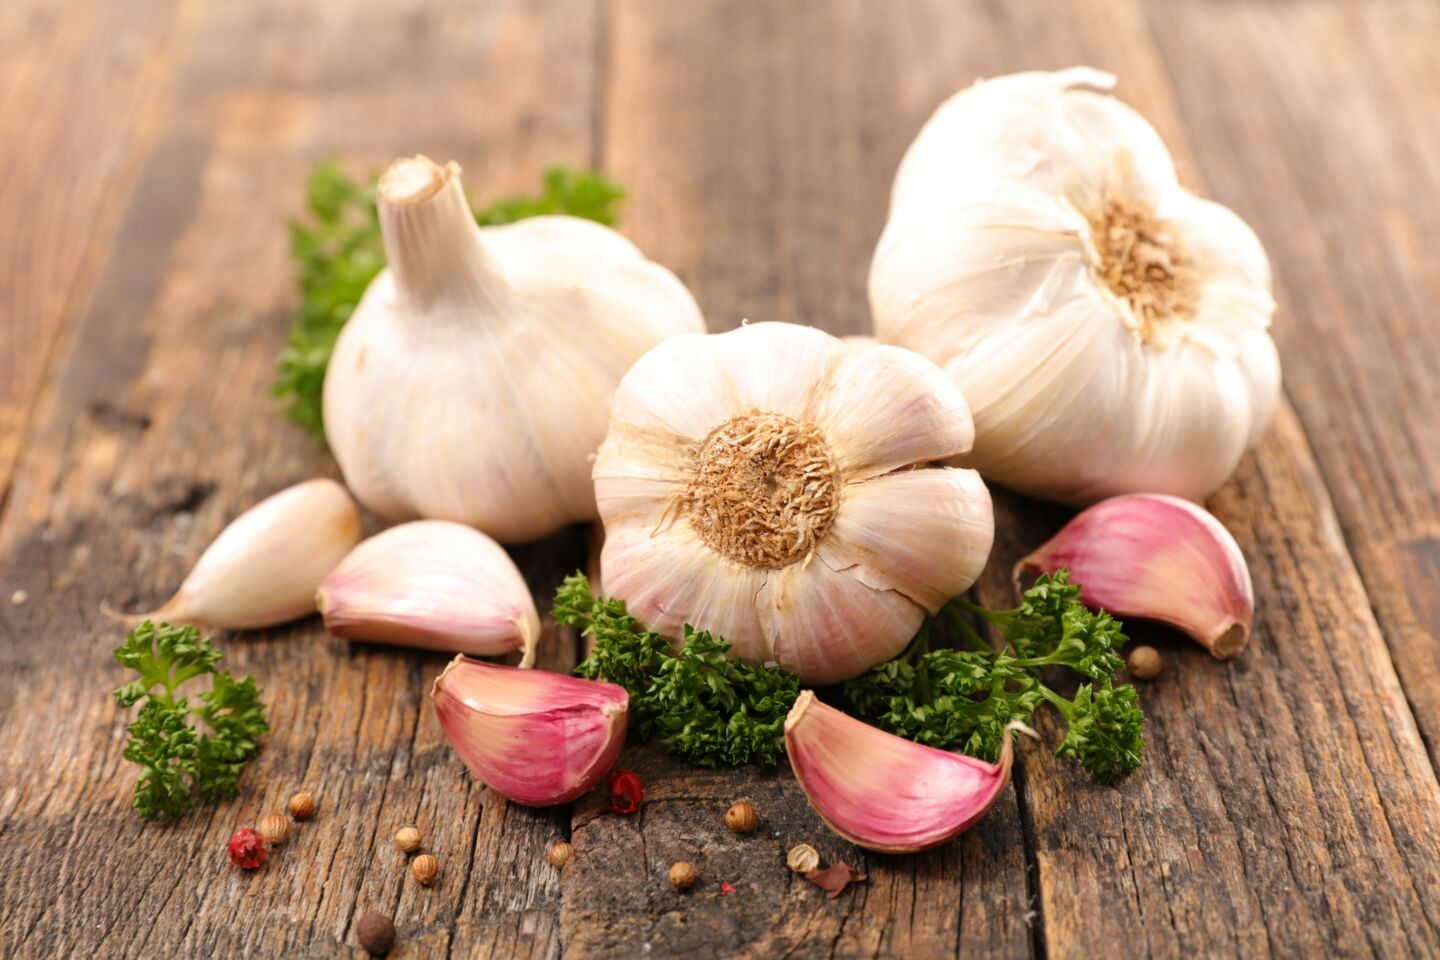
Garlic butter - A mixture of melted butter, crushed garlic, and parsley adds a unique garlicky flavor that pairs perfectly with the cheese and other ingredients.
Cheese mixture - You'll need a mix of mozzarella and parmesan cheese for the ultimate cheesy pull-apart garlic bread.
Substitutions
Yeast
If you don't have active dry yeast, you can use 25 g of fresh instead.
Cheese
you can any cheese you like in this recipe (cheddar, Gruyere, or American cheese are good choices), but I find that it works best with mozzarella for its stringy texture and parmesan cheese for its salty flavor.
Flour
Bread flour or whole wheat flour can be used in this recipe instead of all-purpose flour.
Garlic
Although fresh garlic is more powerful and pungent, you can also use garlic powder in this recipe if that's what you have on hand.
Butter
I opt for unsalted butter in my recipes and add salt to taste, but if you are using salted butter, use 1 teaspoon of salt in the flour mixture.
Parsley
If you don't have parsley, you can use any other dried herbs like oregano or basil.
🔪 How to make
Making pull-apart garlic bread is easy and requires minimal effort. All you need is some pantry ingredients, 10 minutes to prep the dough, 1 hour to let it rise, 10 minutes to shape it, 30 minutes to rise again, and 40 minutes to bake it! Here's what you'll need to do.
Preparations
- Dissolve the sugar and yeast in the water, and let sit for 5 minutes until foamy.
- Mix the flour and salt in a large mixing bowl, then stir in the foamy yeast and olive oil.
- Mix with a wooden spoon until it forms a sticky dough ball.
- Turn the dough onto a lightly floured work surface and knead for about 6 - 8 minutes until it's round, smooth, and elastic.
- Place dough back in the large bowl with a drizzle of olive oil to coat it, then cover with a towel and let the dough rise in a warm place until doubled in size - about an hour.
Cooking instructions
Step 1
Melt the butter in a pan and pour it into a small bowl along with the dried parsley and minced garlic.
Step 2
Combine the mozzarella cheese and parmesan cheese in another bowl.
Step 3
After the dough rises, punch it down and tear small golf-ball sizes pieces from it. You should have enough for around 20 pieces.
Step 4
Roll each dough tear into a rope on a clean work surface and tie it into a knot. (You may need a bit of flour if the ball sticks to the surface.)
Step 5
Dip half of the dough knots into garlic butter and place them 1 inch apart on the bottom of a spring form pan. Sprinkle half of the mixed cheese over them, then dip the rest of the knots into the remaining butter and place them on top.
Step 6
Sprinkle on the remaining cheese over and cover with a towel to rise again, but this time 30 minutes should be enough.
Step 7
Preheat oven to 350 degrees Fahrenheit (177 degrees Celsius) while the dough rises.
Step 8
Once the pull-apart garlic bread has puffed up slightly, bake it in the preheated oven for around 40 minutes until it has a luscious golden brown glow.
Step 9
Remove it from the oven and allow the pull-apart garlic bread to cool slightly for 10 minutes.
Step 10
Serve warm.
💭 Cooking tips
Shaping the dough balls
Pro tip when making dough balls: Use one hand and gently grasp the dough, moving your hand around until the dough forms a nice ball. (It may take many attempts to perfect, but once you know how to do it, you will do 20 balls in 2 minutes).
Using a stand mixer
If you have a stand mixer, use it to save time and effort. Place all the dough ingredients in the bowl of a stand mixer and knead for about 5 minutes using the dough hook attachment.
📖 Recipe Variations
Pull-apart garlic bread is an incredibly versatile dish. Once you have mastered the basics, feel free to customize it and give it a personal touch. Here are a few ideas to get started:
Use different shapes
Braided garlic bread: Separate the dough into 3 equal ropes and braid them together. Brush the braid with garlic butter and then sprinkle the cheese over the top. Allow to rise and puff up slightly before baking.
Folded garlic bread: Make golf-sized dough balls, then roll each one out into a small disc and generously spread the garlic butter evenly on each disk. Fold the discs in half and stack them in a loaf pan to puff up and rise. Bake, tear, and enjoy!
Flavor combos
Bacon and cheesy garlic bread: Sprinkle ½ cup of crispy bacon bits over the first and last layer of dough knots.
Jalapeno cheddar garlic bread: Combine butter, garlic, and parsley with ¼ cup of finely diced jalapenos and swap the parmesan for cheddar cheese.
Chorizo cheesy bread: Add 1 tablespoon of smoked paprika to the garlic butter mixture and sprinkle ½ cup of cooked chorizo over the dough knots.
Rosemary pull-apart bread: Swap the parsley for 2 tablespoons of freshly chopped rosemary and sprinkle some over the dough knots.
🥗 What to serve with
Pull-apart garlic bread is delicious on its own but can also be served as an appetizer or side dish. Here are a few suggestions:
Soup
Serve pull-apart garlic bread as a side dish to your favorite soup, like creamy corn or tomato basil.
Pasta
The cheesy garlic knots pair perfectly with any creamy pasta like macaroni and cheese or chicken alfredo and even spicy pasta recipes like chorizo pasta with zucchini.
Risotto
Garlic bread is a great accompaniment to risotto, and the cheesy garlic knots will add to the creamy texture of the dish. Try asparagus risotto cooked in white wine, stock, butter, and pesto for extra flavor and topped with parmesan cheese.
🙋 Frequently asked questions
Can I make this bread if I don't have a springform pan?
Yes, you can make this bread without a springform pan. Any 9-inch round loaf pan or 8-inch square baking dish will work. Make sure to grease the pan with butter or nonstick spray.
🧊 Storing and ♨️ reheating
Once cooled, leftover pull-apart garlic bread can be stored and reheated later or even eaten cold - you decide!
Room temperature - Wrap the leftover garlic bread in plastic wrap and store it in a bread bin or cupboard for 4 days.
Fridge - You can also refrigerate the bread in an airtight container for up to 5 days.
Freeze - Wrap the garlic bread in plastic wrap and then with aluminum foil. Freeze for up to 3 months.
Reheating - Preheat the oven to 350F (175C). Place the garlic bread on a baking sheet and heat for 5-10 minutes or until warm. You can also warm the garlic bread in a microwave. Place the pieces on a plate and heat in 15-second intervals.
👪 Serving size
This pull-apart garlic bread recipe makes around 12 servings of pull-apart garlic bread. To adjust the amount, you can double the ingredients and bake the bread in a larger baking dish or freeze one.
Pull-apart garlic bread is a delicious and flavorful side dish or appetizer that's simple to make. With just a few ingredients, you can easily customize the flavor of the garlic bread to suit your taste preferences. Serve it with soup, pasta, risotto, or as a side to your favorite dishes.
Love this recipe? Please leave a 5-star 🌟rating in the recipe card below and/or a review in the comments section further down the page.
Try one of my comfort dinner recipes for your next family meal! And if you have any questions, I'm here to help!
📋 Recipe
Pull Apart Garlic Bread
Ingredients
- 2 teaspoon active dry yeast - or 25 g fresh
- ½ teaspoon sugar
- 1 ⅓ cups water - lukewarm
- 3 ½ cups all-purpose flour
- 2 teaspoon salt
- 2 tablespoon olive oil
- ¼ cup butter - melted
- 1 tablespoon parsley - dried
- 3 cloves garlic - pressed
- ¼ cup parmesan cheese - finely grated
- ½ cup mozzarella - shredded
Instructions
Preparations
- Dissolve the sugar and yeast in the water, and let sit for 5 minutes until foamy.
- Mix the flour and salt in a large mixing bowl, then stir in the foamy yeast and olive oil.
- Mix with a wooden spoon until it forms a sticky dough ball.
- Turn the dough onto a lightly floured work surface and knead for about 6 - 8 minutes until it's round, smooth, and elastic.
- Place dough back in the large bowl with a drizzle of olive oil to coat it, then cover with a towel and let the dough rise in a warm place until doubled in size - about an hour.
Cooking instructions
- Melt the butter in a pan and pour it into a small bowl along with the dried parsley and minced garlic.
- Combine the mozzarella cheese and parmesan cheese in another bowl.
- After the dough rises, punch it down and tear small golf-ball sizes pieces from it. You should have enough for around 20 pieces.
- Roll each dough tear into a rope on a clean work surface and tie it into a knot. (You may need a bit of flour if the ball sticks to the surface.)
- Dip half of the dough knots into garlic butter and place them 1 inch apart on the bottom of a spring form pan. Sprinkle half of the mixed cheese over them, then dip the rest of the knots into the remaining butter and place them on top.
- Sprinkle on the remaining cheese over and cover with a towel to rise again, but this time 30 minutes should be enough.
- Preheat oven to 350 degrees Fahrenheit (177 degrees Celsius) while the dough rises.
- Once the pull-apart garlic bread has puffed up slightly, bake it in the preheated oven for around 40 minutes until it has a luscious golden brown glow.
- Remove it from the oven and allow the pull-apart garlic bread to cool slightly for 10 minutes.
- Serve warm.
Kathy
How much water do you add the yeast and sugar to?
MP
Can this be done in a bread machine? What changes would I have to make?
Kim
Do I need to oil the pan?...
Dora Cantu
Sounds great
intissar
hello, it looks so yummy, but i don't speak english that well, can you explain those steps with pictures or figures?
-->the steps are : Roll each ball into a rope and tie into a knot.
-->Dip each knot into the melted butter mixture and place half of them on the bottom of a spring form pan, not quite touching. Sprinkle half of the cheese mixture over them, then stack the remaining knots on top and sprinkle on the rest of the cheese.
intissar
I had fun trying it today and it was a success ^_^ thank you, you are the best ^_^
Nel
For the parmasean cheese, should it be shreddd?
Pentole e Fornelli
Mhmmm...:)
Bree
I made these for dinner last night they were amazing. My family are cheeseaholics so I added more cheese.. I thought they were a bit salty, but everyone else said they were perfect. Thanks for the amazing recipe c:
Karen
Could these be made ahead and frozen?
Brunna
How I set the knots into the pan? Thanks
cindy mcinnis
CAN YOU USE PIZZA DOUGH!
Fede T
This looks fantastic!!!! Can't wait to try!!!